Water damage tends to worsen with time, and it is among the more challenging DIY repairs to undertake, so this guide covers the basic iPhone repair of water damage. 
1. Remove iPhone from the water and Turn it off 
Remove your iPhone from the water as soon as safely possible. Minimize the length of time the iPhone and water are in contact to minimize corrosion.
If your phone is still on when removed from the water, attempt to turn it off. If it's off, do not attempt to turn it on.
2. Check External Ports
Check any external ports (charging port, headphone jack, SIM card slot, etc.) for corrosion as well. These may have to be cleaned out with alcohol and a Anti Static Brush, or replaced if cleaning is not practical.
Pay special attention to cable ends, battery contacts, connectors, pins, and fuses, as these parts are prone to corrosion and can easily cause the phone to malfunction.
Test all the buttons and features (such as the microphone, speakers, wireless connectivity, iPhone camera, etc.).
3. Inspect SIM card tray 
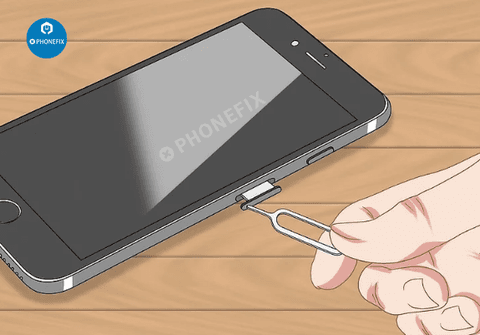
Insert a SIM card eject tool or a paperclip into the small hole in the iPhone SIM card tray. Push to eject the tray, then remove it from the phone. Check if any of the LCIs have turned red for evidence of local water intrusion.
4. Check battery
Water damage can short-circuit the iPhone battery, creating a fire and/or chemical hazard. Be extremely careful if the battery appears damaged or swollen.
If you see or feel any heat, smoke, steam, bubbling, bulging, or melting, avoid handling the phone. Gently remove it and place it in a fireproof (glass, ceramic, or metal) container for transportation to a battery recycling facility.
5. Inspect logic board
Inspect the logic board and any connectors for signs of corrosion, especially in areas where the LCIs are red. 
Remove the iPhone logic board. If you notice corrosion or mater residue on other parts, follow the appropriate guides to remove those as well.
Use a soft brush (like a toothbrush or detailing brush) to gently scrub away any corrosion and water residue on the logic board and other components.
If you can't find the source of the problem, it's possible that components under the EMI shields have been damaged. De-solder the shields and clean the board with an Ultrasonic Cleaning Machine.
If everything is working, congratulations! Go ahead and reassemble your phone.
How to Repair iPhone Water Damage?


