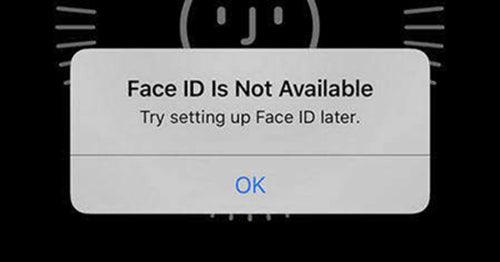
We've heard people complaining Face ID is not available and they also don’t know why. When Face ID won't set up, a lot of people tried to reboot their iPhone. No matter what you do, you can’t unlock your device or set up Face ID for the first time. If the Face ID still won't work after restarting, follow the steps to help you fix Face ID on your iPhone.
First, turn off the iPhone XS MAX, use phone opening tools to disassemble the iPhone, remove the iPhone display assembly.
Apply some heat resistance tape to protect the iPhone front camera and infrared lens, and then take off the iPhone dot projector flex cable from the iPhone.
Install the iPhone dot projector flex cable to the JC Dot Matrix Module to test it, it reports a fuse.

Click"Read" on the JC Pro1000s to backup the original data of the JC dot matrix flex cable to SD memory card, and then take off the flex cable.
Install a new JC dot matrix flex cable iPhone XS MAX model to the JC dot matrix detection module, and then open the file saved on the JC Pro1000s, choose the right file, click "Burn" to write the original flex cable data to the new flex cable, and then take off the JC dot matrix flex.
Use QUICK 861DW hot air gun to heat the iPhone dot projector flex cable to soften the glue between the iron plate and the flex cable.
Attach the iPhone dot projector flex cable to the MJ Dot Matrix Fixture, heat with a hot air gun at 220 degrees, put it under a microscope, use a BGA removal blade to remove the glue, and then clean it with a brush.
After all residual glue has been cleaned, use tweezers to take out the flex cable carefully, and then fix it on the PCB holder fixture.
Heat it by hot air gun at 300 degrees and use a BGA removal blade to remove the MOS tube, and then short-circuit it, and then remove the original magnetic ring.
Put the original magnetic ring under the microscope, and use a BGA removal blade to remove the residual glue on the magnetic right solder joint.
Use soldering iron to plant tin on the new JC dot matrix flex cable, apply some solder paste to the flex cable, and then use a hot air gun to weld the magnetic ring to the flex cable.
Once done, attach the JC dot matrix cable to the JC dot matrix detection module to test it, it shows normal.
Install the burned JC dot matrix flex cable to the iPhone XS Max to test, the test results are correct and the data has been successfully burned.
Remove the cable from the iPhone, and then fix the JC Dot Matrix Flex Cable back into the iron sheet, make sure the magnetic ring is flush with the four sides of the prism, bond the magnetic ring to the prism with 406 glue, and then remove the cable from the fixture.

Install the cable to the iPhone XS MAX, power on the iPhone, remove the heat resistance type from the camera, turn on the iPhone front camera and use portrait mode to test the natural light, the natural light tested is normal.
Go to Set Face ID, the iPhone Face ID set successfully. Locked the iPhone screen, and then unlocked with Face ID, it works, the iPhone XS Max Face ID issue has been successfully fixed.
I hope the repair method in this article can helps you. If you have any other questions about the iPhone phones, please leave a comment in the comments.


