As a mobile phone repair technician, it is essential to have the latest repair techniques and tools. Learning how to repair your phone yourself can save you time and money and give you a sense of accomplishment. Phonefix will share today what we should start with when repairing your phone by ourselves.
Basic knowledge of mobile phones
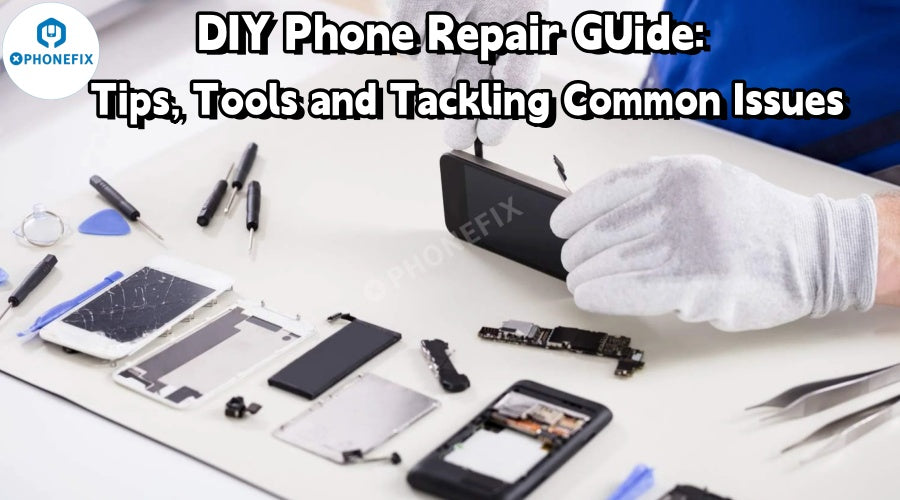
Before starting any repair, it is essential to have a basic understanding of the internal components of the phone. Different mobile phone models have different designs, but in general, smartphones are composed of screens, batteries, motherboards, camera modules, speakers, microphones, and charging ports. If you want to familiarize yourself with the layout of these components in a specific mobile phone model, you can follow the CHINA phonefix website to get relevant iPhone Schematics.
Tools required for DIY mobile phone repair
1. Screwdriver set: Mobile phones usually use small cross-slot head screws, and sometimes Torx head screws. Having a variety of screw sizes ensures that you can handle any screws encountered during the repair process.
2. Plastic Opening Tools: These tools are used to pry open the phone casing without scratching or damaging the delicate casing.
3. Suction cup: For mobile phones with removable screens or back covers, suction cups can be used to gently lift the back cover to access the internal components.
4. Tweezers: Small, pointed tweezers can be used to handle small screws, connectors, and other small parts.
5. Microfiber cloth: A clean microfiber cloth is used to clean the screen, internal components, and any dust or debris that may have accumulated during the repair process.
6. Antistatic mat and wrist strap: Electronic devices are sensitive to electrostatic discharge. Using an antistatic mat and wearing a wrist strap can help prevent static electricity from damaging the phone's delicate circuitry.

Identifying the problem
1. Software-related issues
- Slow performance: If your phone is running slowly, it may be due to a buildup of cached data, too many background apps, or an outdated operating system. Try clearing the cache for individual apps by going to the app settings on your phone.
- App crashes: If certain apps keep crashing, it may be a problem with the app itself. Uninstall and reinstall the app.
2. Hardware-related issues
- Cracked screen: A cracked screen is one of the most common hardware issues. If the touch function still works, it may just be the outer glass that is broken. However, if the touch is unresponsive or there are display issues such as lines or black spots, the entire iPhone Display Assembly may need to be replaced.
- Charging Issues: If your phone won't charge, first check your charging cable and adapter. Try using a different cable and adapter to rule out issues with your charging accessories. If the problem persists, the problem may be with the phone's charging port, which may be dirty or damaged.
- Audio Issues: If you have issues with your speakers (no sound or distorted sound) or microphones (the other party can't hear you during a call), it may be a hardware issue with the respective component. Sometimes, a simple cleaning of the speaker or microphone grille can fix the problem.
DIY Repair Process
1. Gather Information and Parts
- Research Repair Guides: Find detailed repair guides related to your phone model. There are plenty of step-by-step videos on online platforms like YouTube, and the Phonefix website offers written guides with high-quality pictures and text.
- Buy Replacement Parts: Once you've identified the faulty component, buy a replacement part. You can buy parts from CHINA DIYFIXTOOLS Electronic Parts Suppliers.
2. Prepare a Work Area
- Choose a clean, well-lit space: Choose a flat, clean phone repair workbench to work on. Good lighting is essential so you can see small parts and screws clearly.
- Take anti-static precautions: Place an anti-static mat on your work surface and wear a wrist strap attached to the mat. This protects the phone's electronic components from static electricity, which can cause permanent damage.
3. Disassemble your phone
- Power off and remove accessories: Always power off your phone before you begin disassembly. Remove the SIM and SD cards to prevent damage during the repair.
- Remove the back cover: Use a plastic opening tool to gently pry off the iPhone Back Cover Glass of the phone. If you have a suction cup, apply it to the back cover and gently pull to lift it off.
- Disconnect components: Once the back cover is removed, you will see the internal components. The battery is usually one of the first components to disconnect. Locate the battery connector and use a spudger or tweezers to gently lift the connector tab and disconnect the battery. Then, carefully remove any other components, such as the motherboard, iPhone Camera Module, or speakers, by removing screws or loosening the clips that hold them in place. Remember the screws and their locations, as they can vary in size.

4. Replace Faulty Components
- Install New Parts: When installing replacement parts, be careful. For example, if you replace the screen, you can use Wylie Screen Glue Mold to precisely align the new screen with the phone frame and connect the ribbon cables. Make sure the cables are properly seated and not twisted.
- Test New Components: Before completely reassembling your phone, it's a good idea to test new components. Reconnect the battery and power on the phone. Check to see if the problem has been resolved. For example, if you replaced the charging port, test to see if the phone can charge. If the problem persists, double-check the installation of the new parts.
5. Reassemble Your Phone
- Put Components Back in Place: Reverse the disassembly process. Put the components back in their original positions, making sure to properly connect all cables.
- Replace the Back Cover: Once all the internal components are in place, align the back cover and snap it back or tighten it.
6. Final Test
Power on and Check Functionality: Turn on your phone and test all its functions. Check the screen for dead pixels or touch sensitivity issues. Test the camera, speakers, microphone, and charging. Make a call to ensure the audio quality is good. Also, test other features such as Wi-Fi, Bluetooth, and mobile data.
The above are Phonefix's suggestions for DIY enthusiasts to do repairs automatically. If you don't know where to buy these components and tools, it is recommended that you go to the Phonefix Mobile Phone Repair Service to check the product catalog. If you want to know more repair guides, you can check out NEW on the phonefix website to learn more mobile phone repair tips.